The Attack at Lone Pine
A year ago we considered the overall plan for the August Offensive at Gallipoli in 1915. That overview came with the promise to return to the individual actions of the offensive and this month, as we draw closer to the centenary of the campaign, we look at the first battle within the ANZAC perimeter – the attack at Lone Pine.
 General Birdwood planned to fix Turkish attention on the southern end of the ANZAC line with a diversionary attack at Lone Pine on the afternoon of 6 August. During that night Australians, New Zealanders, British and Indian troops, advancing in several columns, would seize the high ground of the main Sari Bair range on the northern flank of the ANZAC position. At the same time, British troops landing at Suvla would neutralise the Turkish threat to this flank movement. Finally, at first light on 7 August the 3rd Light Horse Brigade would attack across The Nek, converging with the New Zealanders attacking down the ridgeline from Chunuk Bair.
The 1st Australian Infantry Brigade (1st, 2nd, 3rd and 4th Battalions) was tasked to carry out the attack during the afternoon of 6 August. Support would be provided by the 7th Battalion (2nd Brigade) and 12th Battalion (3rd Brigade). The objective, Lone Pine, formed the southern lobe of the 400 Plateau feature and was defended by two battalions of the Turkish 47th Regiment, with the third battalion deployed along a spur running off the south. Major General Harold “Hookey” Walker, commanding the 1st Australian Division, had reservations about the plan. However Birdwood, determined to keep Turkish attention away from the main effort in the north, ordered the Lone Pine attack to go ahead but allowed the start time to be put back from 3.00 pm to 5.30 pm.
General Birdwood planned to fix Turkish attention on the southern end of the ANZAC line with a diversionary attack at Lone Pine on the afternoon of 6 August. During that night Australians, New Zealanders, British and Indian troops, advancing in several columns, would seize the high ground of the main Sari Bair range on the northern flank of the ANZAC position. At the same time, British troops landing at Suvla would neutralise the Turkish threat to this flank movement. Finally, at first light on 7 August the 3rd Light Horse Brigade would attack across The Nek, converging with the New Zealanders attacking down the ridgeline from Chunuk Bair.
The 1st Australian Infantry Brigade (1st, 2nd, 3rd and 4th Battalions) was tasked to carry out the attack during the afternoon of 6 August. Support would be provided by the 7th Battalion (2nd Brigade) and 12th Battalion (3rd Brigade). The objective, Lone Pine, formed the southern lobe of the 400 Plateau feature and was defended by two battalions of the Turkish 47th Regiment, with the third battalion deployed along a spur running off the south. Major General Harold “Hookey” Walker, commanding the 1st Australian Division, had reservations about the plan. However Birdwood, determined to keep Turkish attention away from the main effort in the north, ordered the Lone Pine attack to go ahead but allowed the start time to be put back from 3.00 pm to 5.30 pm.
 The 1st Brigade would attack with three battalions in the assault while the 1st Battalion would form the brigade reserve. The 7th and 12th Battalions also would be on call to the brigade commander. The assault battalions would attack in three waves, each of 200 men, with the third wave also carrying picks and shovels to be used in fortifying the captured positions. Each assault battalion had a bombing (grenade) party of 24 men and engineer support was included to demolish any obstructions. To shorten the distance to be covered by the assault, a shallow tunnel was pushed forward and then out to each flank so that, when the tunnel roof was broken through, there would be a new advanced firing line some 50 metres from the Turkish position. The first wave would go forward from this line while subsequent waves would assault from the former front line. The artillery fire plan provided for three days of preparatory fire at the “slow rate”, followed by one hour’s intense fire commencing at 4.30 pm, including naval gunfire from HMS Bacchante. However, the weight of this fire was not sufficient to effectively support the attack.
 At 5.30 pm the artillery fire lifted and the assault went forward along the whole brigade front. Although receiving fire from the northern Turkish positions and from depth positions on Third Ridge, the attackers quickly reached the objective. Here they were surprised by the extent and strength of the overhead cover on the Turkish trenches, which had not been identified in earlier aerial photos. While some men tried to break in through the top, others moved on to the more accessible support area and fought their way back through the trench system from there. Most of the Turkish defenders were still sheltering underground from the artillery fire and a wild, vicious, close quarter struggle developed in dark, confined spaces. In this desperate fight knives, shovels and fists supplemented rifles and bayonets. Having broken into the heart of Lone Pine, the priorities were to clear the Turks from the trenches and to barricade and hold the flanks of the captured area against Turkish counter attacks from Johnston’s Jolly to the north, the Turkish support line in The Cup to the east and from Pine Ridge to the south. This left the Australians holding a series of posts, spread throughout the Turkish trench system, around which on-going bombing duels were fought. Meanwhile men were working furiously to push communications saps and tunnels forward to connect the captured positions to the old Australian front line, allowing reinforcements and supplies to be moved up.
 Throughout the 7th of August and into the 8th, efforts were concentrated on holding out against heavy Turkish bombing and local counter-attacks. The 12th Battalion had reinforced the northern and central sectors of the line and, by 3.00 pm on 8 August, the 7th Battalion had taken over the southern area. From then till 7.00 pm the Turks launched local attacks all along the line but, after dark, concentrated on the southern sector. Here they managed to break in to the main Australian position and were not driven out until 2.00 am on 9 August. The 9th was a day of very heavy fighting with the Turks mounting strong attacks at the junction of the central and southern sectors of the Australian line. Numerous Turkish attacks on the southern Australian posts were repulsed, during which four VCs were won by 7th Battalion members. As night fell on the 9th the Turks ceased efforts to recapture the lost Lone Pine positions and both sides focussed on consolidating the new front line.
A special Boronia battlefield tour in 2015 will commemorate the August Offensive, with in-depth coverage of this significant period in the Gallipoli campaign. For more information, please visit Gallipoli 2015 - August Offence Tour.
Article written by Rod Margetts - who is a battlefield tour guide for Boronia Travel Centre.
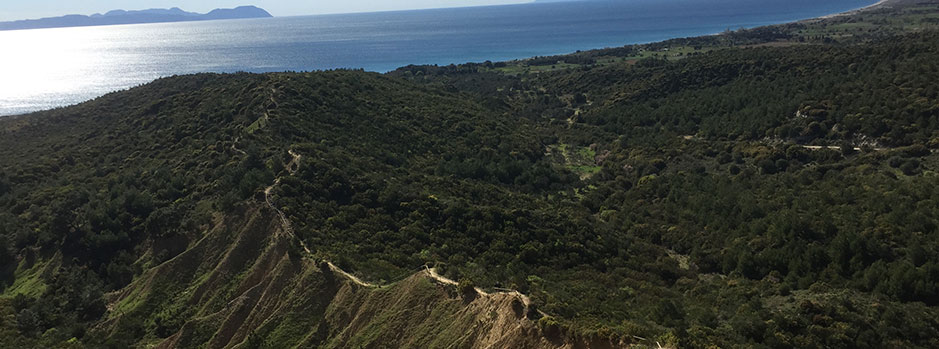
Image Top Right: The main features of the area surrounding Anzac Cove
Image Middle Right: HMS Bacchante
Image Middle Left: Australian troops in a captured Turkish trench at Lone Pine, 6 August 1915
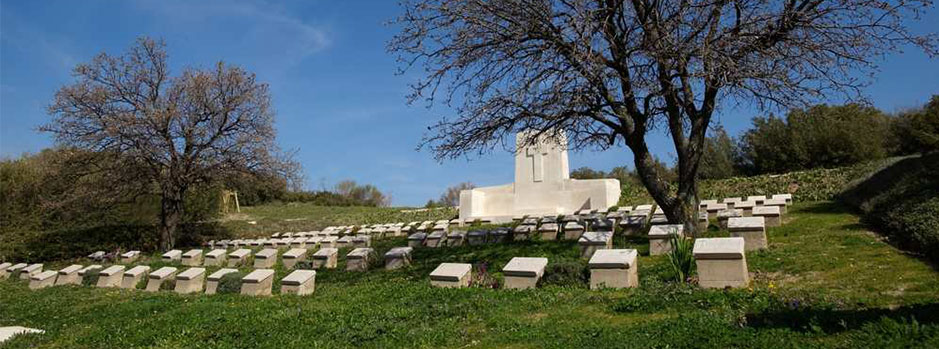
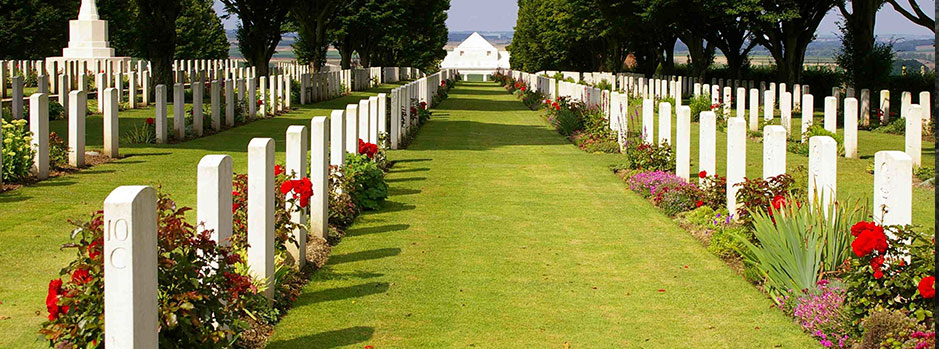
Image Bottom Left: The cemetery at Lone Pine today
Throughout the 7th of August and into the 8th, efforts were concentrated on holding out against heavy Turkish bombing and local counter-attacks. The 12th Battalion had reinforced the northern and central sectors of the line and, by 3.00 pm on 8 August, the 7th Battalion had taken over the southern area. From then till 7.00 pm the Turks launched local attacks all along the line but, after dark, concentrated on the southern sector. Here they managed to break in to the main Australian position and were not driven out until 2.00 am on 9 August. The 9th was a day of very heavy fighting with the Turks mounting strong attacks at the junction of the central and southern sectors of the Australian line. Numerous Turkish attacks on the southern Australian posts were repulsed, during which four VCs were won by 7th Battalion members. As night fell on the 9th the Turks ceased efforts to recapture the lost Lone Pine positions and both sides focussed on consolidating the new front line.
A special Boronia battlefield tour in 2015 will commemorate the August Offensive, with in-depth coverage of this significant period in the Gallipoli campaign. For more information, please visit Gallipoli 2015 - August Offence Tour.
Article written by Rod Margetts - who is a battlefield tour guide for Boronia Travel Centre.
Image Top Right: The main features of the area surrounding Anzac Cove
Image Middle Right: HMS Bacchante
Image Middle Left: Australian troops in a captured Turkish trench at Lone Pine, 6 August 1915
Image Bottom Left: The cemetery at Lone Pine today
General Birdwood planned to fix Turkish attention on the southern end of the ANZAC line with a diversionary attack at Lone Pine on the afternoon of 6 August. During that night Australians, New Zealanders, British and Indian troops, advancing in several columns, would seize the high ground of the main Sari Bair range on the northern flank of the ANZAC position. At the same time, British troops landing at Suvla would neutralise the Turkish threat to this flank movement. Finally, at first light on 7 August the 3rd Light Horse Brigade would attack across The Nek, converging with the New Zealanders attacking down the ridgeline from Chunuk Bair.
The 1st Australian Infantry Brigade (1st, 2nd, 3rd and 4th Battalions) was tasked to carry out the attack during the afternoon of 6 August. Support would be provided by the 7th Battalion (2nd Brigade) and 12th Battalion (3rd Brigade). The objective, Lone Pine, formed the southern lobe of the 400 Plateau feature and was defended by two battalions of the Turkish 47th Regiment, with the third battalion deployed along a spur running off the south. Major General Harold “Hookey” Walker, commanding the 1st Australian Division, had reservations about the plan. However Birdwood, determined to keep Turkish attention away from the main effort in the north, ordered the Lone Pine attack to go ahead but allowed the start time to be put back from 3.00 pm to 5.30 pm.
The 1st Brigade would attack with three battalions in the assault while the 1st Battalion would form the brigade reserve. The 7th and 12th Battalions also would be on call to the brigade commander. The assault battalions would attack in three waves, each of 200 men, with the third wave also carrying picks and shovels to be used in fortifying the captured positions. Each assault battalion had a bombing (grenade) party of 24 men and engineer support was included to demolish any obstructions. To shorten the distance to be covered by the assault, a shallow tunnel was pushed forward and then out to each flank so that, when the tunnel roof was broken through, there would be a new advanced firing line some 50 metres from the Turkish position. The first wave would go forward from this line while subsequent waves would assault from the former front line. The artillery fire plan provided for three days of preparatory fire at the “slow rate”, followed by one hour’s intense fire commencing at 4.30 pm, including naval gunfire from HMS Bacchante. However, the weight of this fire was not sufficient to effectively support the attack.
At 5.30 pm the artillery fire lifted and the assault went forward along the whole brigade front. Although receiving fire from the northern Turkish positions and from depth positions on Third Ridge, the attackers quickly reached the objective. Here they were surprised by the extent and strength of the overhead cover on the Turkish trenches, which had not been identified in earlier aerial photos. While some men tried to break in through the top, others moved on to the more accessible support area and fought their way back through the trench system from there. Most of the Turkish defenders were still sheltering underground from the artillery fire and a wild, vicious, close quarter struggle developed in dark, confined spaces. In this desperate fight knives, shovels and fists supplemented rifles and bayonets. Having broken into the heart of Lone Pine, the priorities were to clear the Turks from the trenches and to barricade and hold the flanks of the captured area against Turkish counter attacks from Johnston’s Jolly to the north, the Turkish support line in The Cup to the east and from Pine Ridge to the south. This left the Australians holding a series of posts, spread throughout the Turkish trench system, around which on-going bombing duels were fought. Meanwhile men were working furiously to push communications saps and tunnels forward to connect the captured positions to the old Australian front line, allowing reinforcements and supplies to be moved up.
Throughout the 7th of August and into the 8th, efforts were concentrated on holding out against heavy Turkish bombing and local counter-attacks. The 12th Battalion had reinforced the northern and central sectors of the line and, by 3.00 pm on 8 August, the 7th Battalion had taken over the southern area. From then till 7.00 pm the Turks launched local attacks all along the line but, after dark, concentrated on the southern sector. Here they managed to break in to the main Australian position and were not driven out until 2.00 am on 9 August. The 9th was a day of very heavy fighting with the Turks mounting strong attacks at the junction of the central and southern sectors of the Australian line. Numerous Turkish attacks on the southern Australian posts were repulsed, during which four VCs were won by 7th Battalion members. As night fell on the 9th the Turks ceased efforts to recapture the lost Lone Pine positions and both sides focussed on consolidating the new front line.
A special Boronia battlefield tour in 2015 will commemorate the August Offensive, with in-depth coverage of this significant period in the Gallipoli campaign. For more information, please visit Gallipoli 2015 - August Offence Tour.
Article written by Rod Margetts - who is a battlefield tour guide for Boronia Travel Centre.
Image Top Right: The main features of the area surrounding Anzac Cove
Image Middle Right: HMS Bacchante
Image Middle Left: Australian troops in a captured Turkish trench at Lone Pine, 6 August 1915
Image Bottom Left: The cemetery at Lone Pine today
This entry was posted in Historical Highlights. Bookmark the permalink.