Failure on Chunuk Bair
In earlier historical highlights we discussed the various elements of the overall August Offensive plan – attacks from within the ANZAC perimeter in conjunction with an ambitious outflanking maneuvre against the main Sari Bair range. In March we examined the tragic consequences for the 3rd Light Horse Brigade when this plan began to unravel in the early morning hours of 7 August 1915. What happened to the New Zealand attack on Chunuk Bair that was vital if the light horsemen were to break through at The Nek?
 The task of carrying out the flanking movement on Sari Bair fell to the New Zealand and Australian Division and the 29th Indian Brigade, reinforced by elements of the 13th Division and part of the 10th Division, both newly-arrived British formations. Overall command rested with Major-General Godley, commander of the New Zealand and Australian Division. This phase of the overall plan was, in itself, both ambitious and complicated. Here we will look in detail at the New Zealand part of the operation – the attack to capture the height of Chunuk Bair and then cooperate with the 3rd Light Horse Brigade’s attack across The Nek. The remainder of the flanking movement will feature in later historical highlights.
The New Zealand operation began at 8.30 pm on 6 August with a preliminary move to clear the Turkish outposts overlooking the beach to the north of the ANZAC perimeter. The four New Zealand Mounted Rifles regiments, reinforced by members of the Maori half-battalion, captured Old No. 3 Post, Big Table Top, Destroyer Hill and Little Table Top in well executed attacks. Their fifth objective, Bauchop’s Hill, proved more difficult, with casualties in the Otago Mounted Rifles totaling 100, including the commanding officer.
With the way forward secure, the four battalions of the New Zealand Infantry Brigade began their move. However, by this time, the timetable for the operation was already running several hours behind schedule – a time penalty that could not be made up. The Kiwis, moving along two routes, were to concentrate on Rhododendron Ridge for the final assault on Chunuk Bair. In the darkness and confusing terrain the Canterbury Battalion became lost, eventually ending up back at the beach. Dawn on 7 August found the New Zealand Infantry Brigade, still below the crest of Chunuk Bair, waiting for the missing unit to arrive. It was daylight before the brigade was ordered forward but by then the Turks had reinforced Chunuk Bair.
The task of carrying out the flanking movement on Sari Bair fell to the New Zealand and Australian Division and the 29th Indian Brigade, reinforced by elements of the 13th Division and part of the 10th Division, both newly-arrived British formations. Overall command rested with Major-General Godley, commander of the New Zealand and Australian Division. This phase of the overall plan was, in itself, both ambitious and complicated. Here we will look in detail at the New Zealand part of the operation – the attack to capture the height of Chunuk Bair and then cooperate with the 3rd Light Horse Brigade’s attack across The Nek. The remainder of the flanking movement will feature in later historical highlights.
The New Zealand operation began at 8.30 pm on 6 August with a preliminary move to clear the Turkish outposts overlooking the beach to the north of the ANZAC perimeter. The four New Zealand Mounted Rifles regiments, reinforced by members of the Maori half-battalion, captured Old No. 3 Post, Big Table Top, Destroyer Hill and Little Table Top in well executed attacks. Their fifth objective, Bauchop’s Hill, proved more difficult, with casualties in the Otago Mounted Rifles totaling 100, including the commanding officer.
With the way forward secure, the four battalions of the New Zealand Infantry Brigade began their move. However, by this time, the timetable for the operation was already running several hours behind schedule – a time penalty that could not be made up. The Kiwis, moving along two routes, were to concentrate on Rhododendron Ridge for the final assault on Chunuk Bair. In the darkness and confusing terrain the Canterbury Battalion became lost, eventually ending up back at the beach. Dawn on 7 August found the New Zealand Infantry Brigade, still below the crest of Chunuk Bair, waiting for the missing unit to arrive. It was daylight before the brigade was ordered forward but by then the Turks had reinforced Chunuk Bair.
 Watching from across the valley, the light horsemen on Russell’s Top would have known that things weren’t going to plan. There would be no supporting attack by the Kiwis onto the Turkish rear at The Nek. The scene was set for the ensuing tragedy with General Birdwood deciding that the light horse attack would go ahead, in an attempt to assist the assault on Chunuk Bair.
General Godley insisted that the Kiwis press on. At 10.30 a.m., the Auckland Battalion attacked, advancing 100 metres for the loss of 300 men. When the Wellington Battalion was ordered to repeat the attack, the CO, Lieutenant-Colonel Malone, refused to attack during daylight, insisting his men would take Chunuk Bair that night. Godley agreed to delay further attempts until darkness provided some concealment.
Watching from across the valley, the light horsemen on Russell’s Top would have known that things weren’t going to plan. There would be no supporting attack by the Kiwis onto the Turkish rear at The Nek. The scene was set for the ensuing tragedy with General Birdwood deciding that the light horse attack would go ahead, in an attempt to assist the assault on Chunuk Bair.
General Godley insisted that the Kiwis press on. At 10.30 a.m., the Auckland Battalion attacked, advancing 100 metres for the loss of 300 men. When the Wellington Battalion was ordered to repeat the attack, the CO, Lieutenant-Colonel Malone, refused to attack during daylight, insisting his men would take Chunuk Bair that night. Godley agreed to delay further attempts until darkness provided some concealment.
 The Wellington Battalion attack, jumping off at 4.15 am on 8 August, found only small parties of Turks on the hill. By 5.00 am the Kiwi presence on Chunuk Bair became obvious to Turks on neighbouring features and the Wellingtons came under increasingly heavy fire as they struggled to dig in. Some reinforcements arrived. Half of the British 7th Gloucester Battalion extended the line, but the 8th Welch Pioneers were shattered while trying to move up onto the position. The Turkish fire from Hill Q and Battleship Hill, on either flank of Chunuk Bair, prevented any further support to the Wellingtons.
The Turkish reaction to the situation on Chunuk Bair was desperate. Units were fed into the developing counterattack as they became available, putting ever increasing pressure on the shrinking number of New Zealand defenders. At 10.30 pm the Wellingtons were relieved by the Otago Battalion and two squadrons of New Zealand Mounted Rifles. Only 70 of the 760 Wellingtons who had attacked were unwounded and Malone was dead – killed by friendly artillery fire.
The Wellington Battalion attack, jumping off at 4.15 am on 8 August, found only small parties of Turks on the hill. By 5.00 am the Kiwi presence on Chunuk Bair became obvious to Turks on neighbouring features and the Wellingtons came under increasingly heavy fire as they struggled to dig in. Some reinforcements arrived. Half of the British 7th Gloucester Battalion extended the line, but the 8th Welch Pioneers were shattered while trying to move up onto the position. The Turkish fire from Hill Q and Battleship Hill, on either flank of Chunuk Bair, prevented any further support to the Wellingtons.
The Turkish reaction to the situation on Chunuk Bair was desperate. Units were fed into the developing counterattack as they became available, putting ever increasing pressure on the shrinking number of New Zealand defenders. At 10.30 pm the Wellingtons were relieved by the Otago Battalion and two squadrons of New Zealand Mounted Rifles. Only 70 of the 760 Wellingtons who had attacked were unwounded and Malone was dead – killed by friendly artillery fire.
 The Kiwis continued to hold Chunuk Bair until relieved by British battalions on the Night of the 9th. These inexperienced units were disoriented and exhausted by the time the relief was complete and were totally unprepared for the major Turkish counterattack organised for dawn on 10 August. This swept the remaining troops off Chunuk Bair and was only prevented from achieving a complete breakthrough by using every available man, supported by naval gunfire from ships offshore.
Having held Chunuk Bair briefly, the New Zealanders finally consolidated along the seaward slopes of the hill. The commanding high ground of the Sari Bair range would remain in Turkish hands for the remainder of the campaign.
The Boronia August Offensive Tour in 2015 provides the opportunity to study this action in detail, including a chance to walk the actual ground of Rhododendron Ridge, down to the beach.
Article written by Rod Margetts - who is a battlefield tour guide for Boronia Travel Centre.
Image top right: Hamilton's, Birdwood's and Godley's proposed August offensive at Gallipoli. (Map from Robert Likeman's From Law to War, The Life of Brigadier-General Lachlan Wilson of the Light Horse).
Image middle left: General Sir William Birdwood surveys operations on North Beach during his last day on Gallipoli. Source. Australian War Memorial.
Image middle right: New Zealand soldiers rest during the assault towards Chunuk Bair. Source: Anzac Site.
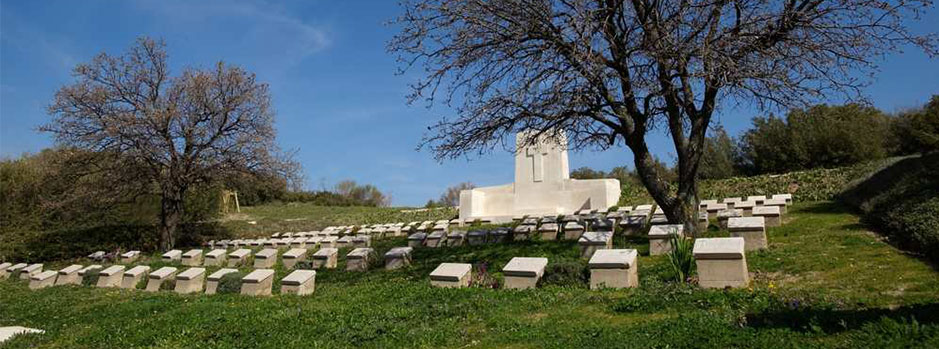
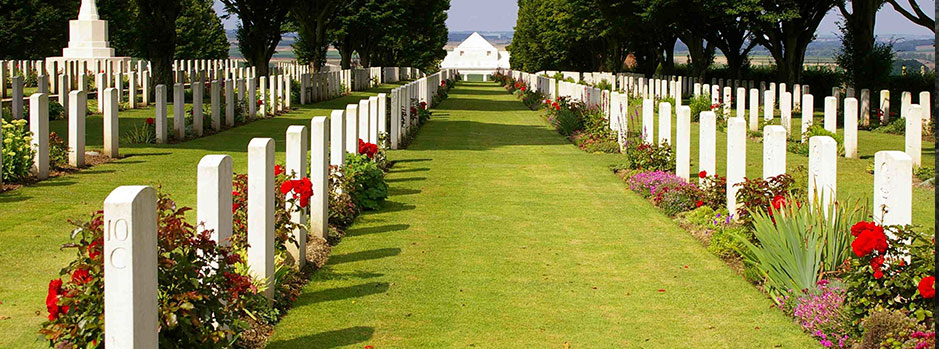
Image bottom left: Chunuk Bair Cemetery and the New Zealand National Memorial today. Source: Veterans Affairs NZ.
The Kiwis continued to hold Chunuk Bair until relieved by British battalions on the Night of the 9th. These inexperienced units were disoriented and exhausted by the time the relief was complete and were totally unprepared for the major Turkish counterattack organised for dawn on 10 August. This swept the remaining troops off Chunuk Bair and was only prevented from achieving a complete breakthrough by using every available man, supported by naval gunfire from ships offshore.
Having held Chunuk Bair briefly, the New Zealanders finally consolidated along the seaward slopes of the hill. The commanding high ground of the Sari Bair range would remain in Turkish hands for the remainder of the campaign.
The Boronia August Offensive Tour in 2015 provides the opportunity to study this action in detail, including a chance to walk the actual ground of Rhododendron Ridge, down to the beach.
Article written by Rod Margetts - who is a battlefield tour guide for Boronia Travel Centre.
Image top right: Hamilton's, Birdwood's and Godley's proposed August offensive at Gallipoli. (Map from Robert Likeman's From Law to War, The Life of Brigadier-General Lachlan Wilson of the Light Horse).
Image middle left: General Sir William Birdwood surveys operations on North Beach during his last day on Gallipoli. Source. Australian War Memorial.
Image middle right: New Zealand soldiers rest during the assault towards Chunuk Bair. Source: Anzac Site.
Image bottom left: Chunuk Bair Cemetery and the New Zealand National Memorial today. Source: Veterans Affairs NZ.
The task of carrying out the flanking movement on Sari Bair fell to the New Zealand and Australian Division and the 29th Indian Brigade, reinforced by elements of the 13th Division and part of the 10th Division, both newly-arrived British formations. Overall command rested with Major-General Godley, commander of the New Zealand and Australian Division. This phase of the overall plan was, in itself, both ambitious and complicated. Here we will look in detail at the New Zealand part of the operation – the attack to capture the height of Chunuk Bair and then cooperate with the 3rd Light Horse Brigade’s attack across The Nek. The remainder of the flanking movement will feature in later historical highlights.
The New Zealand operation began at 8.30 pm on 6 August with a preliminary move to clear the Turkish outposts overlooking the beach to the north of the ANZAC perimeter. The four New Zealand Mounted Rifles regiments, reinforced by members of the Maori half-battalion, captured Old No. 3 Post, Big Table Top, Destroyer Hill and Little Table Top in well executed attacks. Their fifth objective, Bauchop’s Hill, proved more difficult, with casualties in the Otago Mounted Rifles totaling 100, including the commanding officer.
With the way forward secure, the four battalions of the New Zealand Infantry Brigade began their move. However, by this time, the timetable for the operation was already running several hours behind schedule – a time penalty that could not be made up. The Kiwis, moving along two routes, were to concentrate on Rhododendron Ridge for the final assault on Chunuk Bair. In the darkness and confusing terrain the Canterbury Battalion became lost, eventually ending up back at the beach. Dawn on 7 August found the New Zealand Infantry Brigade, still below the crest of Chunuk Bair, waiting for the missing unit to arrive. It was daylight before the brigade was ordered forward but by then the Turks had reinforced Chunuk Bair.
Watching from across the valley, the light horsemen on Russell’s Top would have known that things weren’t going to plan. There would be no supporting attack by the Kiwis onto the Turkish rear at The Nek. The scene was set for the ensuing tragedy with General Birdwood deciding that the light horse attack would go ahead, in an attempt to assist the assault on Chunuk Bair.
General Godley insisted that the Kiwis press on. At 10.30 a.m., the Auckland Battalion attacked, advancing 100 metres for the loss of 300 men. When the Wellington Battalion was ordered to repeat the attack, the CO, Lieutenant-Colonel Malone, refused to attack during daylight, insisting his men would take Chunuk Bair that night. Godley agreed to delay further attempts until darkness provided some concealment.
The Wellington Battalion attack, jumping off at 4.15 am on 8 August, found only small parties of Turks on the hill. By 5.00 am the Kiwi presence on Chunuk Bair became obvious to Turks on neighbouring features and the Wellingtons came under increasingly heavy fire as they struggled to dig in. Some reinforcements arrived. Half of the British 7th Gloucester Battalion extended the line, but the 8th Welch Pioneers were shattered while trying to move up onto the position. The Turkish fire from Hill Q and Battleship Hill, on either flank of Chunuk Bair, prevented any further support to the Wellingtons.
The Turkish reaction to the situation on Chunuk Bair was desperate. Units were fed into the developing counterattack as they became available, putting ever increasing pressure on the shrinking number of New Zealand defenders. At 10.30 pm the Wellingtons were relieved by the Otago Battalion and two squadrons of New Zealand Mounted Rifles. Only 70 of the 760 Wellingtons who had attacked were unwounded and Malone was dead – killed by friendly artillery fire.
The Kiwis continued to hold Chunuk Bair until relieved by British battalions on the Night of the 9th. These inexperienced units were disoriented and exhausted by the time the relief was complete and were totally unprepared for the major Turkish counterattack organised for dawn on 10 August. This swept the remaining troops off Chunuk Bair and was only prevented from achieving a complete breakthrough by using every available man, supported by naval gunfire from ships offshore.
Having held Chunuk Bair briefly, the New Zealanders finally consolidated along the seaward slopes of the hill. The commanding high ground of the Sari Bair range would remain in Turkish hands for the remainder of the campaign.
The Boronia August Offensive Tour in 2015 provides the opportunity to study this action in detail, including a chance to walk the actual ground of Rhododendron Ridge, down to the beach.
Article written by Rod Margetts - who is a battlefield tour guide for Boronia Travel Centre.
Image top right: Hamilton's, Birdwood's and Godley's proposed August offensive at Gallipoli. (Map from Robert Likeman's From Law to War, The Life of Brigadier-General Lachlan Wilson of the Light Horse).
Image middle left: General Sir William Birdwood surveys operations on North Beach during his last day on Gallipoli. Source. Australian War Memorial.
Image middle right: New Zealand soldiers rest during the assault towards Chunuk Bair. Source: Anzac Site.
Image bottom left: Chunuk Bair Cemetery and the New Zealand National Memorial today. Source: Veterans Affairs NZ.
This entry was posted in Historical Highlights. Bookmark the permalink.