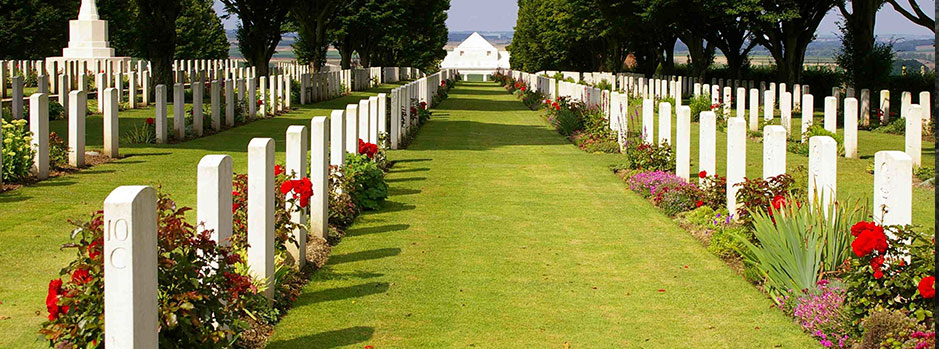
The Battle of Maryang San, Korean War
October marks the sixty-second anniversary of a battle in Korea, described in the official Australian history of the conflict as “probably the greatest single feat of the Australian Army during the Korean War. The action was fought by the Third Battalion, The Royal Australian Regiment (3 RAR), and was a phase of a larger operation designed to seize strategically important ground before the ceasefire and armistice negotiations brought operations to a close.
3 RAR had deployed to Japan in February 1946 as part of the Australian commitment to the post-war British Commonwealth Occupation Force (BCOF). When the Korean War broke out in 1950 3 RAR, as the only Australian infantry battalion remaining in BCOF, was our first ground unit committed to Korea.
 By October 1951 3 RAR was part of 28th British Commonwealth Brigade, within the 1st Commonwealth Division. It had already fought the defensive battle for which it is better known – Kapyong – in April and, since August, had been patrolling against the Chinese in the Imjin River salient. A major offensive, Operation Commando, was planned with the aim of driving the Chinese line back, thus preventing their observation of the river valley. The 1st Commonwealth Division objectives for the operation were a series of steep and heavily fortified hills west of the river. In Phase 1 the British 1st King’s Own Scottish Borderers would capture the Kowang San feature to the south. With this secure, 3 RAR would launch an attack on Hill 317, Maryang San.
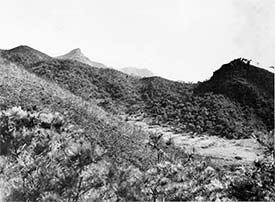 Maryang San was a steep, rugged hill with a series of heavily defended knolls at the summit and ridges running east and west. It was occupied by a battalion of Chinese troops. Two previous American attempts to capture the feature by attacking across the valley floor had failed. Therefore, Lieutenant Colonel Frank Hassett, commanding 3 RAR, decided to use the high ground of the ridgelines as an approach.
The attack by the Borderers on 3 October met strong resistance from the Chinese and by nightfall had only captured the lower slopes of Kowang San. Ordered to support renewed efforts by the Borderers next day, Hassett tasked C Company to capture two adjacent hills, disrupting the Chinese fire support to the main feature. The attack was launched at 5.00 am on 4 October and, moving quickly under cover of a heavy mist, the company took the Chinese defenders by surprise. The objectives were secured by 11.00 am and a patrol sent to reconnoitre Kowang San found the Chinese had withdrawn. After coordination with the Borderers, C Company consolidated on their original two objectives.
 The 3 RAR attack on Maryang San began at 4.55 am on 5 October. A Company began to advance up a south-eastern spur over very difficult terrain, creating a diversion from the main effort by B and D Companies, approaching from the east. The attackers were initially protected by a thick mist, in which the companies became separated, but this lifted by mid-morning. In heavy fighting D Company captured a series of knolls along the ridge. Later in the afternoon C Company, having returned from its previous task in support of the Borderers, took over the advance and at 5.00 pm, after capturing the last occupied knoll, secured the summit from which the Chinese had withdrawn. Throughout 6 October 3 RAR was subjected to heavy artillery and mortar fire while the Chinese attempted to infiltrate the captured position.
On 7 October 3 RAR was ordered to support an attack by a Northumberland Fusiliers battalion against a neighbouring feature, Hill 217. This required the capture of another knoll on the ridge running west from Maryang San, nicknamed “The Hinge”. B Company assaulted along the ridge, securing the objective after a fierce struggle. A defence was quickly organised as the Chinese tried to isolate the force on “The Hinge”, mounting a series of strong counter-attacks against the position over the next 18 hours. The artillery fire in support of these attacks was judged by Hassett to be the heaviest and most accurate that Australians had faced in Korea. It had the added effect of making resupply to, and casualty evacuation from B Company, extremely difficult.
 3 RAR was relieved on Maryang San on 9 October by the Borderers. The capture and dogged defence of “The Hinge” forced the Chinese to give up Hill 217. Australian casualties for the series of actions were 20 killed and 89 wounded.
On the night of 4/5 November the Borderers were attacked by the Chinese after a five hour bombardment. By first light on 5 November Maryang San was back in Chinese hands. It was not recaptured during the remaining nineteen months of the Korean War.
Article written by Rod Margetts - who is a battlefield tour guide for Boronia Travel Centre.
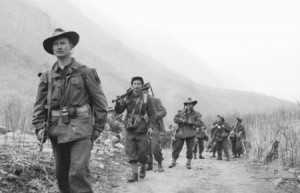
Image Top Left: Members of 3 RAR move forward during the Korean War in 1951. Source. Wikipedia.com
Image Middle Right: Maryang San (Hill 317) is the steep hill in the left far distance. This photograph was taken from UN lines prior to the assault on the hill. In October 1951 the hill was captured by 3rd Battalion, Royal Australian Regiment during Operation Commando. Source: AWM
Image Middle Left: Troops of 3rd Battalion, the Royal Australian Regiment (3RAR). Source: AWM
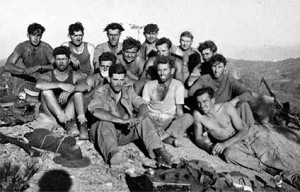
Image Bottom Right: Informal group portrait of non-wounded survivors of the 5th Platoon, B Company, 3rd Battalion, the Royal Australian Regiment (3RAR) after the company was withdrawn from the line at the end of the Battle of Maryang San in October 1951. Source: AWM
 By October 1951 3 RAR was part of 28th British Commonwealth Brigade, within the 1st Commonwealth Division. It had already fought the defensive battle for which it is better known – Kapyong – in April and, since August, had been patrolling against the Chinese in the Imjin River salient. A major offensive, Operation Commando, was planned with the aim of driving the Chinese line back, thus preventing their observation of the river valley. The 1st Commonwealth Division objectives for the operation were a series of steep and heavily fortified hills west of the river. In Phase 1 the British 1st King’s Own Scottish Borderers would capture the Kowang San feature to the south. With this secure, 3 RAR would launch an attack on Hill 317, Maryang San.
 Maryang San was a steep, rugged hill with a series of heavily defended knolls at the summit and ridges running east and west. It was occupied by a battalion of Chinese troops. Two previous American attempts to capture the feature by attacking across the valley floor had failed. Therefore, Lieutenant Colonel Frank Hassett, commanding 3 RAR, decided to use the high ground of the ridgelines as an approach.
The attack by the Borderers on 3 October met strong resistance from the Chinese and by nightfall had only captured the lower slopes of Kowang San. Ordered to support renewed efforts by the Borderers next day, Hassett tasked C Company to capture two adjacent hills, disrupting the Chinese fire support to the main feature. The attack was launched at 5.00 am on 4 October and, moving quickly under cover of a heavy mist, the company took the Chinese defenders by surprise. The objectives were secured by 11.00 am and a patrol sent to reconnoitre Kowang San found the Chinese had withdrawn. After coordination with the Borderers, C Company consolidated on their original two objectives.
 The 3 RAR attack on Maryang San began at 4.55 am on 5 October. A Company began to advance up a south-eastern spur over very difficult terrain, creating a diversion from the main effort by B and D Companies, approaching from the east. The attackers were initially protected by a thick mist, in which the companies became separated, but this lifted by mid-morning. In heavy fighting D Company captured a series of knolls along the ridge. Later in the afternoon C Company, having returned from its previous task in support of the Borderers, took over the advance and at 5.00 pm, after capturing the last occupied knoll, secured the summit from which the Chinese had withdrawn. Throughout 6 October 3 RAR was subjected to heavy artillery and mortar fire while the Chinese attempted to infiltrate the captured position.
On 7 October 3 RAR was ordered to support an attack by a Northumberland Fusiliers battalion against a neighbouring feature, Hill 217. This required the capture of another knoll on the ridge running west from Maryang San, nicknamed “The Hinge”. B Company assaulted along the ridge, securing the objective after a fierce struggle. A defence was quickly organised as the Chinese tried to isolate the force on “The Hinge”, mounting a series of strong counter-attacks against the position over the next 18 hours. The artillery fire in support of these attacks was judged by Hassett to be the heaviest and most accurate that Australians had faced in Korea. It had the added effect of making resupply to, and casualty evacuation from B Company, extremely difficult.
 3 RAR was relieved on Maryang San on 9 October by the Borderers. The capture and dogged defence of “The Hinge” forced the Chinese to give up Hill 217. Australian casualties for the series of actions were 20 killed and 89 wounded.
On the night of 4/5 November the Borderers were attacked by the Chinese after a five hour bombardment. By first light on 5 November Maryang San was back in Chinese hands. It was not recaptured during the remaining nineteen months of the Korean War.
Article written by Rod Margetts - who is a battlefield tour guide for Boronia Travel Centre.
Image Top Left: Members of 3 RAR move forward during the Korean War in 1951. Source. Wikipedia.com
Image Middle Right: Maryang San (Hill 317) is the steep hill in the left far distance. This photograph was taken from UN lines prior to the assault on the hill. In October 1951 the hill was captured by 3rd Battalion, Royal Australian Regiment during Operation Commando. Source: AWM
Image Middle Left: Troops of 3rd Battalion, the Royal Australian Regiment (3RAR). Source: AWM
Image Bottom Right: Informal group portrait of non-wounded survivors of the 5th Platoon, B Company, 3rd Battalion, the Royal Australian Regiment (3RAR) after the company was withdrawn from the line at the end of the Battle of Maryang San in October 1951. Source: AWM
This entry was posted in Historical Highlights. Bookmark the permalink.
